You could be watching MCrider videos ad-free. Find out how.
If you are an ad-free member make sure to log in to see your ad-free video.
Let’s take a look at an older video where a rider offers some advice on lane positioning. I actually saw this video several years ago, and for some reason, it stuck with me. Today, I want to break it down, share my thoughts, and hear what you think in the comments.
This video sponsored by our friends at Quad Lock. Check out all of their mounting options to securely mount your smartphone to your motorcycle.
Use Promo Code “MCrider” at checkout for an exclusive discount.
Quick Update: Road Strategy Book Is Almost Here
Before we jump into the lane position tips, a quick note on the Road Strategy Book. Many of you have preordered—and it looks like I’ll get the shipment back from the printer this weekend.
If that holds true, I’ll be shipping out all the pre-orders on Monday. If you still want to grab a Road Strategy Book first print edition, you can order now and I’ll get it out the door Monday—as long as UPS holds up their end of the deal.
Tip #1: Break the Lane Into 3 Zones
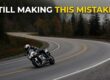
When it comes to motorcycle safety, there aren’t many advantages we have over drivers in cars—but lane positioning is one of them.
A car is locked into its lane. A motorcycle? You can divide your lane into three distinct zones, and that flexibility can give you a major safety advantage.
A smart rider breaks the lane into three parts:
- Position 1 (Left)
- Position 2 (Center)
- Position 3 (Right)
Let’s look at when and why to use each.
Position 1 (Left)
Use it when:
- You’re in traffic and want to be more visible to oncoming vehicles
- You’re following another vehicle and need a clearer view ahead
- You’re preparing to pass or overtake
- You’re entering a left-hand curve and want to improve your line of sight
Why:
- Increases your visibility to drivers ahead and in the oncoming lane
- Helps you avoid blind spots
- Gives you a better reaction zone for side-street traffic
Caution:
- Avoid hugging the centerline too closely—especially with oncoming trucks or in windy conditions
- Be cautious in narrow lanes
Position 2 (Center)
Use it when:
- You’re alone on the road and want even spacing on both sides
- You’re navigating tight lanes, like in construction zones
- You want to assert your position in the lane to prevent cars from trying to share it
Why:
- Keeps you centered and visible
- Helpful on straight, obstacle-free roads
- Discourages lane-sharing behavior from inattentive drivers
Caution:
- This is where oil and debris often collect—especially at intersections and in wet conditions
- Avoid if the surface looks slick or traction is questionable
Position 3 (Right)
Use it when:
- You’re on a multi-lane road and want to stay away from faster-moving traffic
- Oncoming traffic is hugging the centerline
- You’re entering a right-hand curve and want better cornering and visibility
- You’re approaching a hill where traffic may drift over the line
Why:
- Gives you buffer space from oncoming vehicles
- Often offers a potential escape route to the shoulder
- Manages risk in sketchy traffic situations
Caution:
- Watch for driveways, merging traffic, and parked vehicles
- Shoulders can be unpredictable—watch for debris and rough surfaces
Tip #2: Adjust for Visibility and Escape Routes
Remember, one of our main goals on the road is to see and be seen. Two of the best tools we have to control that are:
- Following distance
- Lane position
If more riders just kept better space and adjusted their position for visibility and escape options, there’d be far fewer motorcycle crashes on the road.
Tip #3: Constantly Re-Evaluate
There’s no “one-size-fits-all” lane position.
As a rider, you should constantly ask yourself:
- How well can I see?
- How well can others see me?
- What is my escape route?
That mental checklist helps keep you out of trouble. Failing to adjust your lane position means you’re giving up one of your biggest riding strategy advantages—and you’re riding less safely as a result.
Till next week,
Stay safe out there and use every inch of that lane to your advantage.
Links you may be interested in:
Become a Member of MCrider
Get the Field Guide Print Edition
Order ANYTHING on Amazon and Support MCrider
Braking Tips
Entry Speed
Head & Eyes
Slow – Look – Press – Roll
Trail Braking
Following Distance
Police Skills
Riding Under the Influence
Become a Member for immediate access to the MCrider Field Guide.
Below is some gear that I ride with on a daily basis…if you are in the need of good riding gear, the products below have worked well for me.
KLIM Jacket – https://www.MCrider.com/KLIM
Shoei Motorcycle Helmets – https://www.MCrider.com/Shoei
Windshirt/Jacket Liner – https://www.MCrider.com/Liner
Lee Park Sumo Gloves – https://www.MCrider.com/LeeParks
The best source for guiding your practice session is the MCrider Field Guide.
If you are not a Member join for immediate access to the forums and Field Guide