You could be watching MCrider videos ad-free. Find out how.
If you are an ad-free member make sure to log in to see your ad-free video.
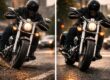
Motorcycle Emergency Braking: Beyond the Basics
You’ve probably practiced emergency braking in a straight line — smooth, controlled, and on clean pavement.
But out on the road, conditions aren’t always perfect.
What happens when the road is wet and slick?
Or when you’re leaned over in a corner and need to stop fast?
What if you grab a handful of brake right as your tires roll over wet leaves or painted lines?
Today on MCrider, we’re taking braking beyond the basics — learning how to handle real-world emergency stops when traction changes, surfaces get unpredictable, and you don’t have the luxury of perfect timing or perfect grip.
Because mastering braking isn’t just about stopping fast — it’s about stopping in control, no matter what’s under your tires.
The Role of ABS in Motorcycle Safety
Before we dive into different braking scenarios, let’s talk about ABS — Anti-lock Braking Systems.
ABS has been one of the biggest safety advances for motorcycles in the last few decades. When you brake hard and a tire starts to lose traction, ABS rapidly releases and reapplies brake pressure to prevent wheel lockup.
The result: you maintain steering control, and your chances of staying upright go way up.
If your motorcycle has cornering ABS, you get even more steering control — but not all ABS-equipped bikes include this feature. Check your bike’s specs to know for sure.
Tip: ABS doesn’t change the laws of physics. Braking is still all about tire traction. Think of ABS as a safety net, not a free pass to be sloppy with your braking.
When conditions turn bad or panic sets in, ABS can be the difference between a crash and staying upright.
Wet Roads
Wet roads change everything about traction. Water creates a thin layer between the tire and the pavement, and that means less grip — especially during the first few minutes of rain, when oil and grime rise to the surface.
If you’re caught riding as the rain starts, it can feel like riding on ice. Pull off and wait about 15 minutes for the road to wash clean before continuing.
Braking Tips for Wet Conditions:
- Be smooth. Squeeze the brake lever progressively — start light, then build pressure as weight transfers to the front tire.
- Stay upright. The more lean you have, the less traction you have available. If you’re in a corner, reduce lean angle before applying more brake pressure.
- Scan ahead. Painted lines, tar snakes, and fresh asphalt can be slicker than they look. Give yourself extra following distance and brake earlier and smoother than normal.
Good braking on wet roads isn’t about how fast you can stop — it’s about how much control you can keep when grip disappears.
Avoiding the Emergency Stop
The best way to manage braking on wet roads is to avoid needing it.
- Increase following distance. Double it in the rain.
- Look farther ahead. Spot brake lights and hazards early.
- Smooth inputs. Roll off the throttle and brake gently instead of grabbing a handful.
That space and awareness can be the difference between a close call and a crash.
Painted Lines and Metal Surfaces
Painted lines, manhole covers, and bridge grates all share one thing — they get slick, especially when wet. Add braking into that mix and traction can vanish instantly.
How to Handle Slick Surfaces:
- Get your heavy braking done before you reach the slick area.
- Ease up slightly as you cross, then reapply once you’re back on good pavement.
- Keep the bike upright and inputs smooth — no grabbing or stabbing the brakes.
These hazards often show up at intersections, in crosswalks, or on bridges. Keep your eyes moving, position yourself to avoid them, and anticipate the traction change before it happens.
A little awareness early can prevent a big problem later.
Braking Mid-Corner
Braking mid-corner is one of the most challenging moments for any rider. You’re leaned over, your tires are using most of their grip for cornering — and suddenly, you need to slow down.
The Rules of Mid-Corner Braking:
- Don’t panic and grab the brakes. That’s a quick way to overload the front tire.
- Ease off the throttle first. Let the bike settle, then apply light, progressive brake pressure.
- Stand the bike up slightly. If possible, bring it more upright before applying stronger braking.
- Look through the corner. Your bike follows your vision — not your fears.
This is where trail braking shines. By keeping light pressure on the front brake as you lean into the corner, you maintain geometry and keep the bike balanced. That way, if you need more brake mid-corner, you’re ready.
That’s why I’ve made trail braking part of my everyday riding — you never know which corner will demand it.
Leaves on the Road (and Hidden Moisture)
A road covered in leaves might look harmless — even scenic — but it can be one of the slickest surfaces you’ll ever encounter. Leaves trap moisture underneath, creating a thin, slimy layer between your tires and the road.
Braking on Leaf-Covered Roads:
- Stay smooth and upright. Treat it like braking on ice.
- Use gentle brake pressure. Avoid abrupt inputs.
- Scan for hazards. Dry-looking leaves can hide water, mud, or even gravel underneath.
Leaves often pile up in shady areas, low spots, and along the center of the lane. Adjust your line early, especially after rain or in the morning when dew adds more slickness.
Good riders don’t just react — they anticipate. Spot those traction changes early and adjust before they catch you off guard.
Building Confidence and Control
Emergency braking isn’t just about stopping fast — it’s about staying in control when everything goes wrong.
Wet pavement, slick paint, mid-corner surprises, or a road full of leaves all test your understanding of traction and technique.
The riders who handle these moments best aren’t the ones with lightning reflexes — they’re the ones who practice and know exactly how their bike behaves at the edge of traction.
Find a safe place to practice. Get familiar with your brakes. Build the muscle memory that turns panic into precision. Because when things go wrong out there, that training is what keeps you upright and riding another day.
Keep Building Your Motorcycle Skills
If you want to keep improving your motorcycle safety and control, check out the MCrider resources:
- The MCrider Field Guide – Build foundational skills: clutch work, slow-speed control, and braking precision.
- The Road Strategy Book – Learn the mental side of riding: reading traffic, spotting risks, and avoiding emergencies.
- The Motorcycle Maintenance Log Book – Keep your bike in top shape; good tires and brakes are your first defense against traction loss.
Find the Field Guide and Road Strategy Book at MCrider.com/books, or get all three on Amazon.
When you build your skills, sharpen your awareness, and maintain your motorcycle, you’re ready for whatever the road throws at you.
Links you may be interested in:
Become a Member of MCrider
Get the Field Guide Print Edition
Order ANYTHING on Amazon and Support MCrider
Braking Tips
Entry Speed
Head & Eyes
Slow – Look – Press – Roll
Trail Braking
Following Distance
Police Skills
Riding Under the Influence
Become a Member for immediate access to the MCrider Field Guide.
Below is some gear that I ride with on a daily basis…if you are in the need of good riding gear, the products below have worked well for me.
KLIM Jacket – https://www.MCrider.com/KLIM
Shoei Motorcycle Helmets – https://www.MCrider.com/Shoei
Windshirt/Jacket Liner – https://www.MCrider.com/Liner
Lee Park Sumo Gloves – https://www.MCrider.com/LeeParks
The best source for guiding your practice session is the MCrider Field Guide.
If you are not a Member join for immediate access to the forums and Field Guide